AWS Odin Engine Cluster Usage Instructions (For Public)#
You need to take a few steps both before and after deploying one of the CloudFormation stacks on the AWS Marketplace listing before you can start using Odin Engine. This guide explains all of the them in detail.
Please note that this guide does not aim to teach you how to use Odin Engine or explain its components in depth. It only demonstrates how to configure your AWS environment and verify that the cluster works correctly. Please refer to the product documentation on Odin Portal for a more detailed overview of the system and usage instructions. You will need to create an account on Odin Portal to access this documentation.
Set-up AWS License Manager#
Before Odin Engine cluster can be deployed using one of the CloudFormation stacks, you must set up AWS License Manager.
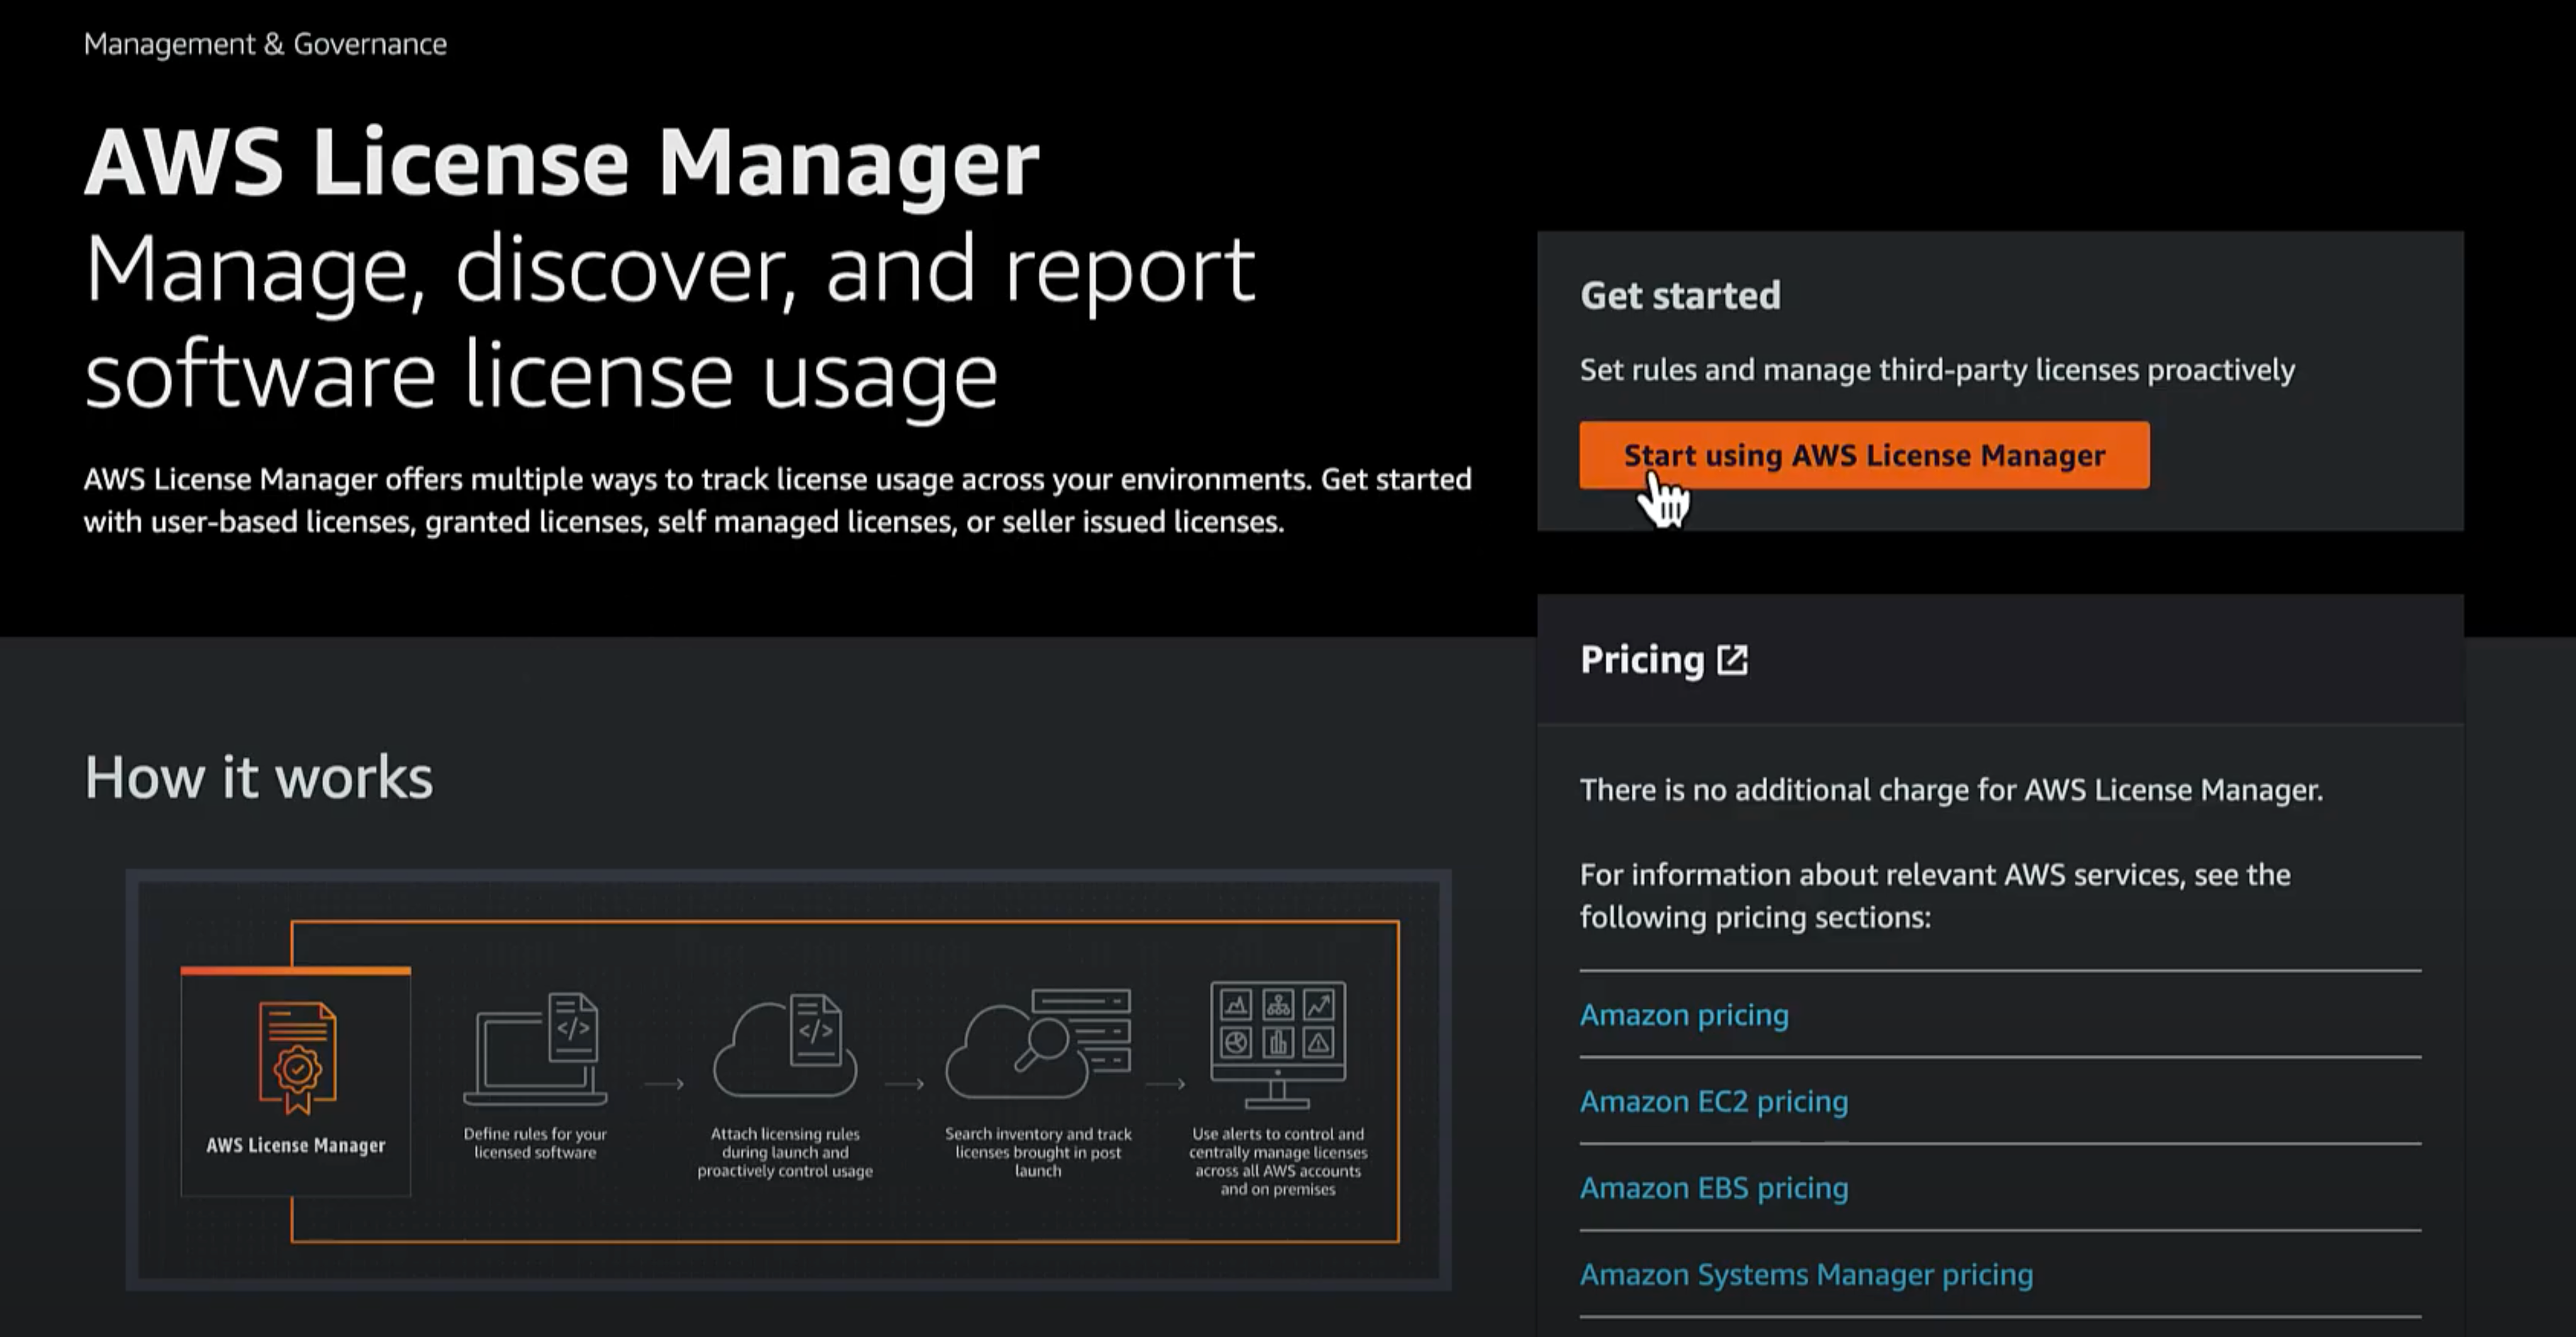
Access the License Manager console as an admin in the management account and click Start Using AWS License Manager.
You will be prompted to create the required permissions to manage licenses. Grant AWS License Manager the required permissions by selecting Grant Permissions.
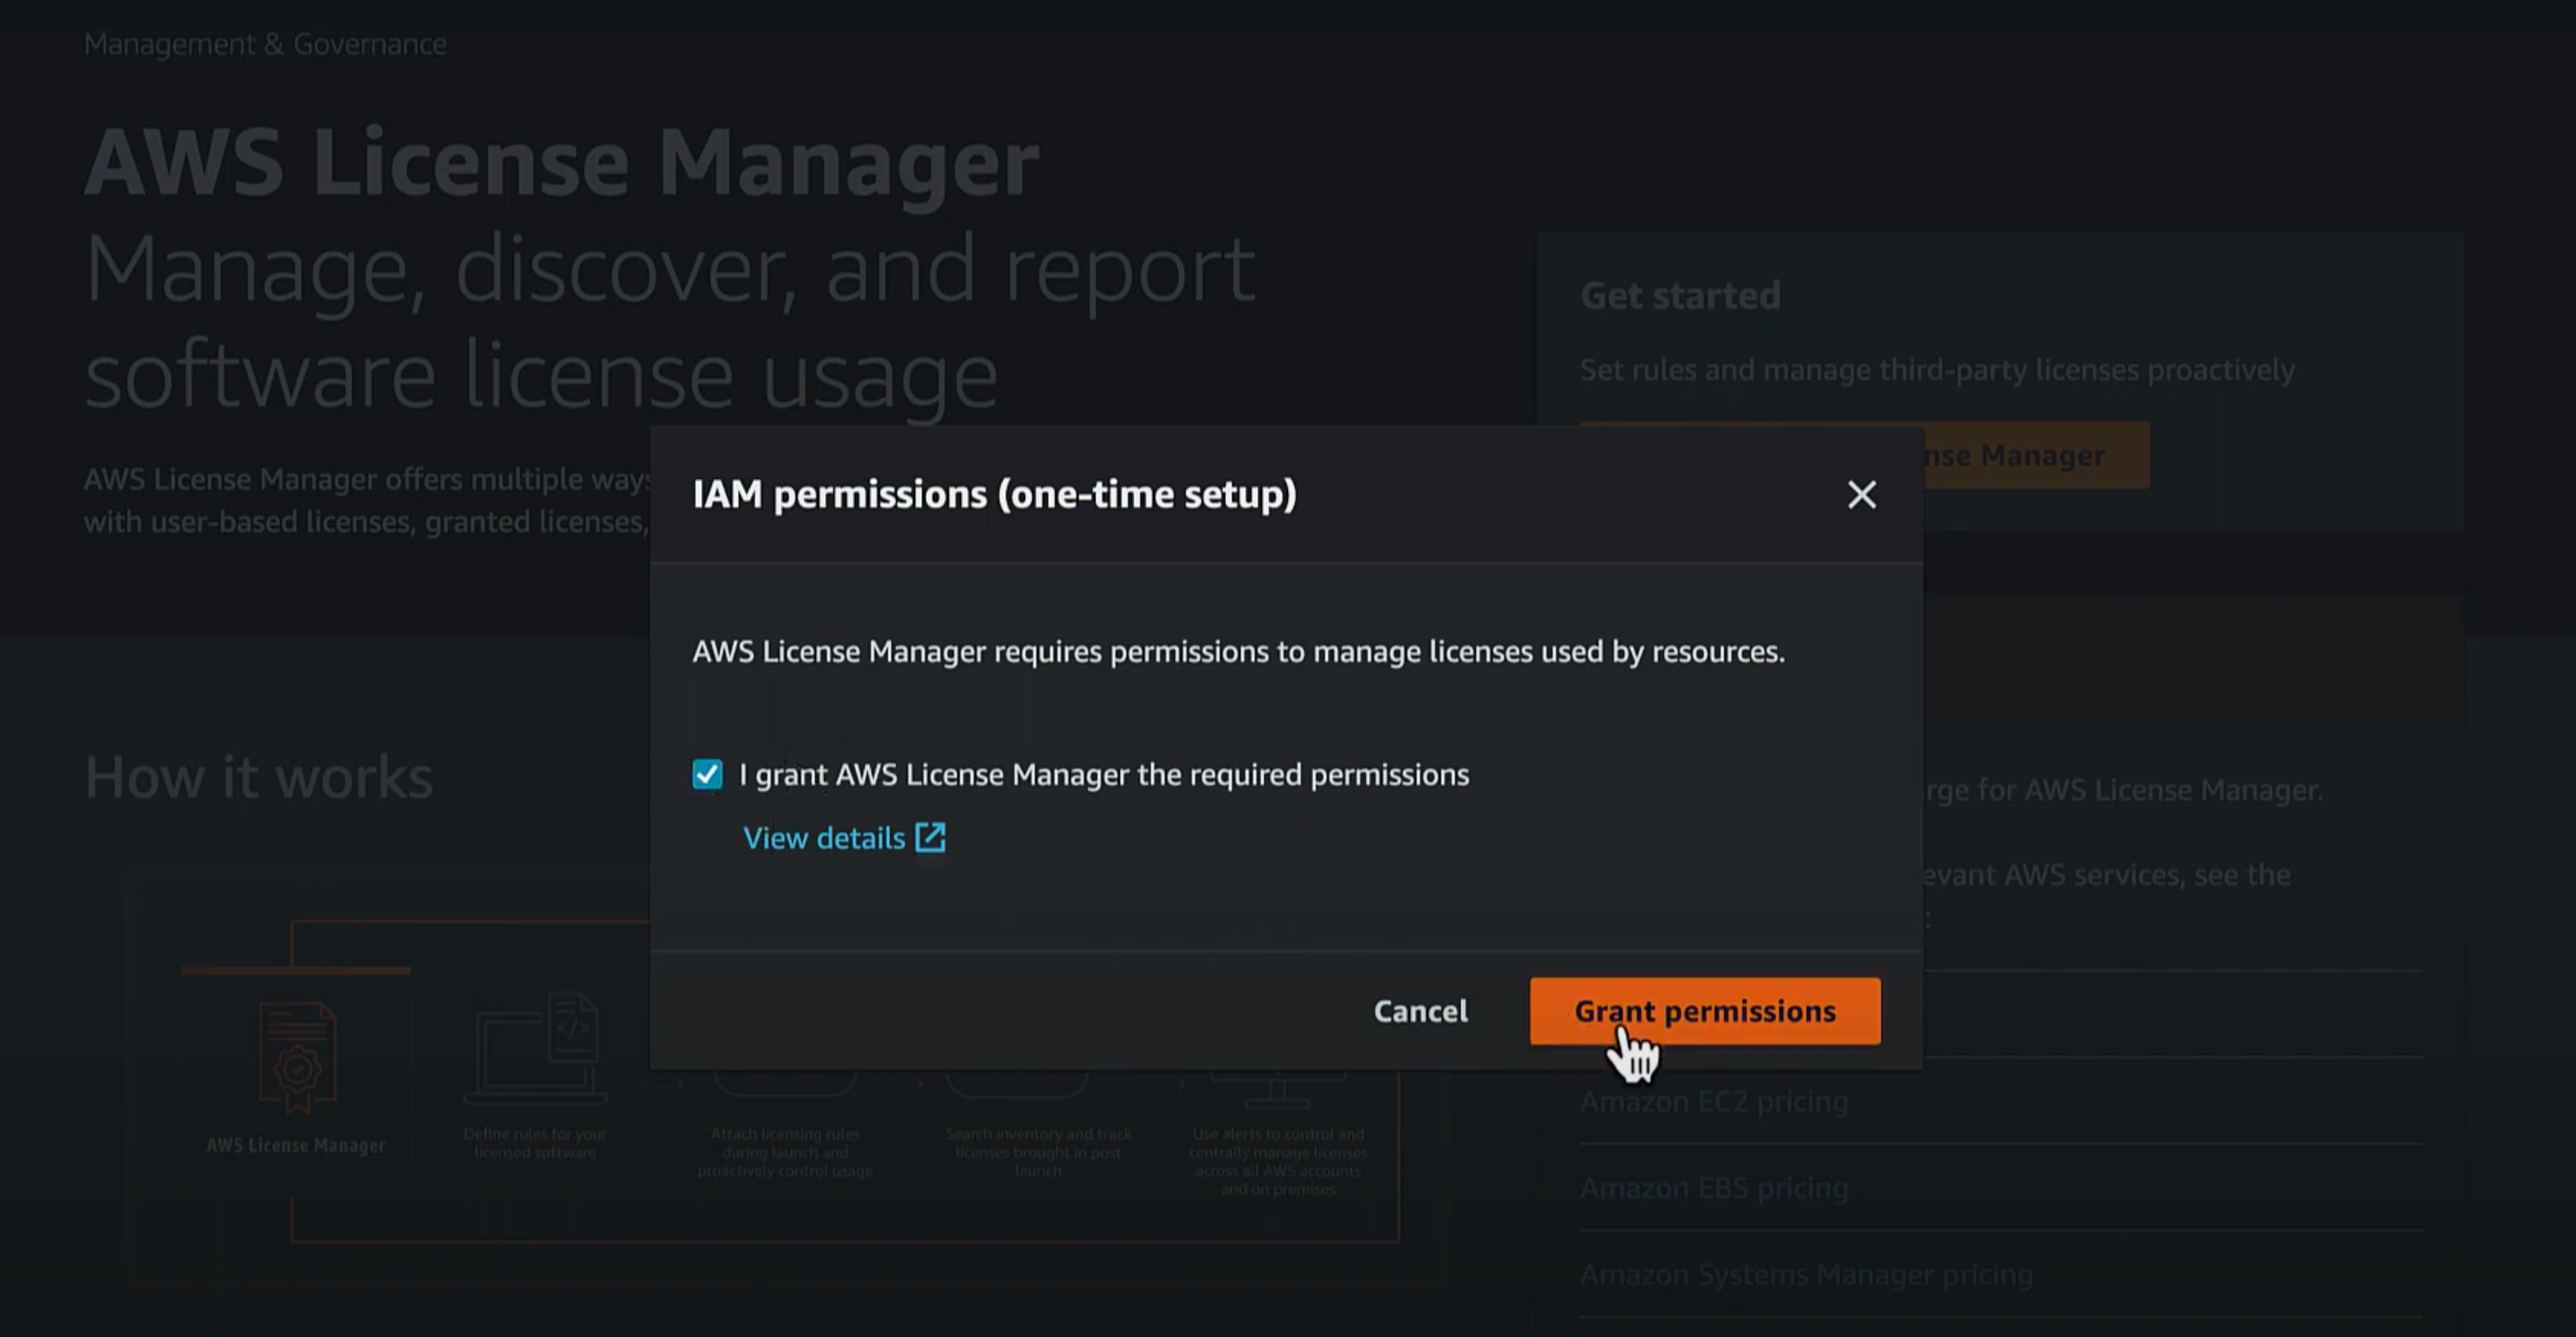
You only need to enable AWS License Manager once per account. This setup is managed globally and applies across all regions.
Create a Key Pair in Your Deployment Region#
A key pair, consisting of a private key and a public key, is a set of security credentials that you use to prove your identity when connecting to an instance. It is worth noting that key pairs are not global; they exist and can only be used within the region where they are created.
How to Create a Key Pair in the AWS Console
Navigate to the EC2 service.
In the left-hand menu, select Key Pairs under the Network & Security section.
Click Create Key Pair.
Provide a Key Pair Name and choose a Key Pair Type (e.g., RSA or ED25519).
Specify the Private Key File Format (e.g., PEM for OpenSSH or PPK for PuTTY).
Click Create Key Pair.
Download the private key file securely when prompted.
Note: Ensure you save the private key file safely, as it cannot be downloaded again.
You will also need to provide this key pair’s name (without the file extension) before deploying the CloudFormation stack later.
Configure and Deploy Odin Engine Cluster CloudFormation Stack#
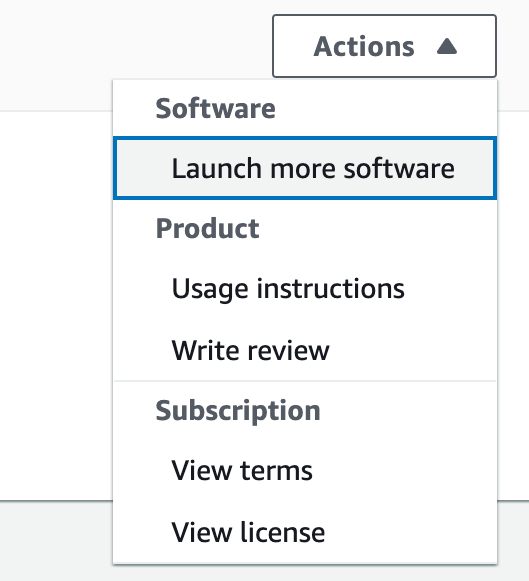
You are now ready to deploy the CloudFormation stack. In the AWS Management Console, go to AWS Marketplace, click Manage Subscriptions, and select your Odin Engine subscription. On the right hand side of the Agreement section, click Actions and select Launch more software.
On the next page, select your desired Fulfillment option and Software version, and click Continue to Launch.
On Launch this software page, click on one of the two links under Deployment template to deploy one of the stacks. There are two stacks you can choose from: Large 8 vCPUs 32 GiB Memory Stack and Standard 4 vCPUs 16.0 GiB Memory Stack. The Standard stack deploys a cluster containing a controller and 3 worker instances with 4 vCPUs and 16.0 GiB of Memory, and the Large stack deploys a cluster containing a controller and 3 worker instances with 8 vCPUs and 32.0 GiB of Memory. All the other components of both clusters are identical for both stacks. There is a more detailed overview of the components of Odin Engine cluster in a later section in this guide.
Once you select the stack, the next page you will see is Quick create stack. You can select your deployment region here as shown on the screenshot.
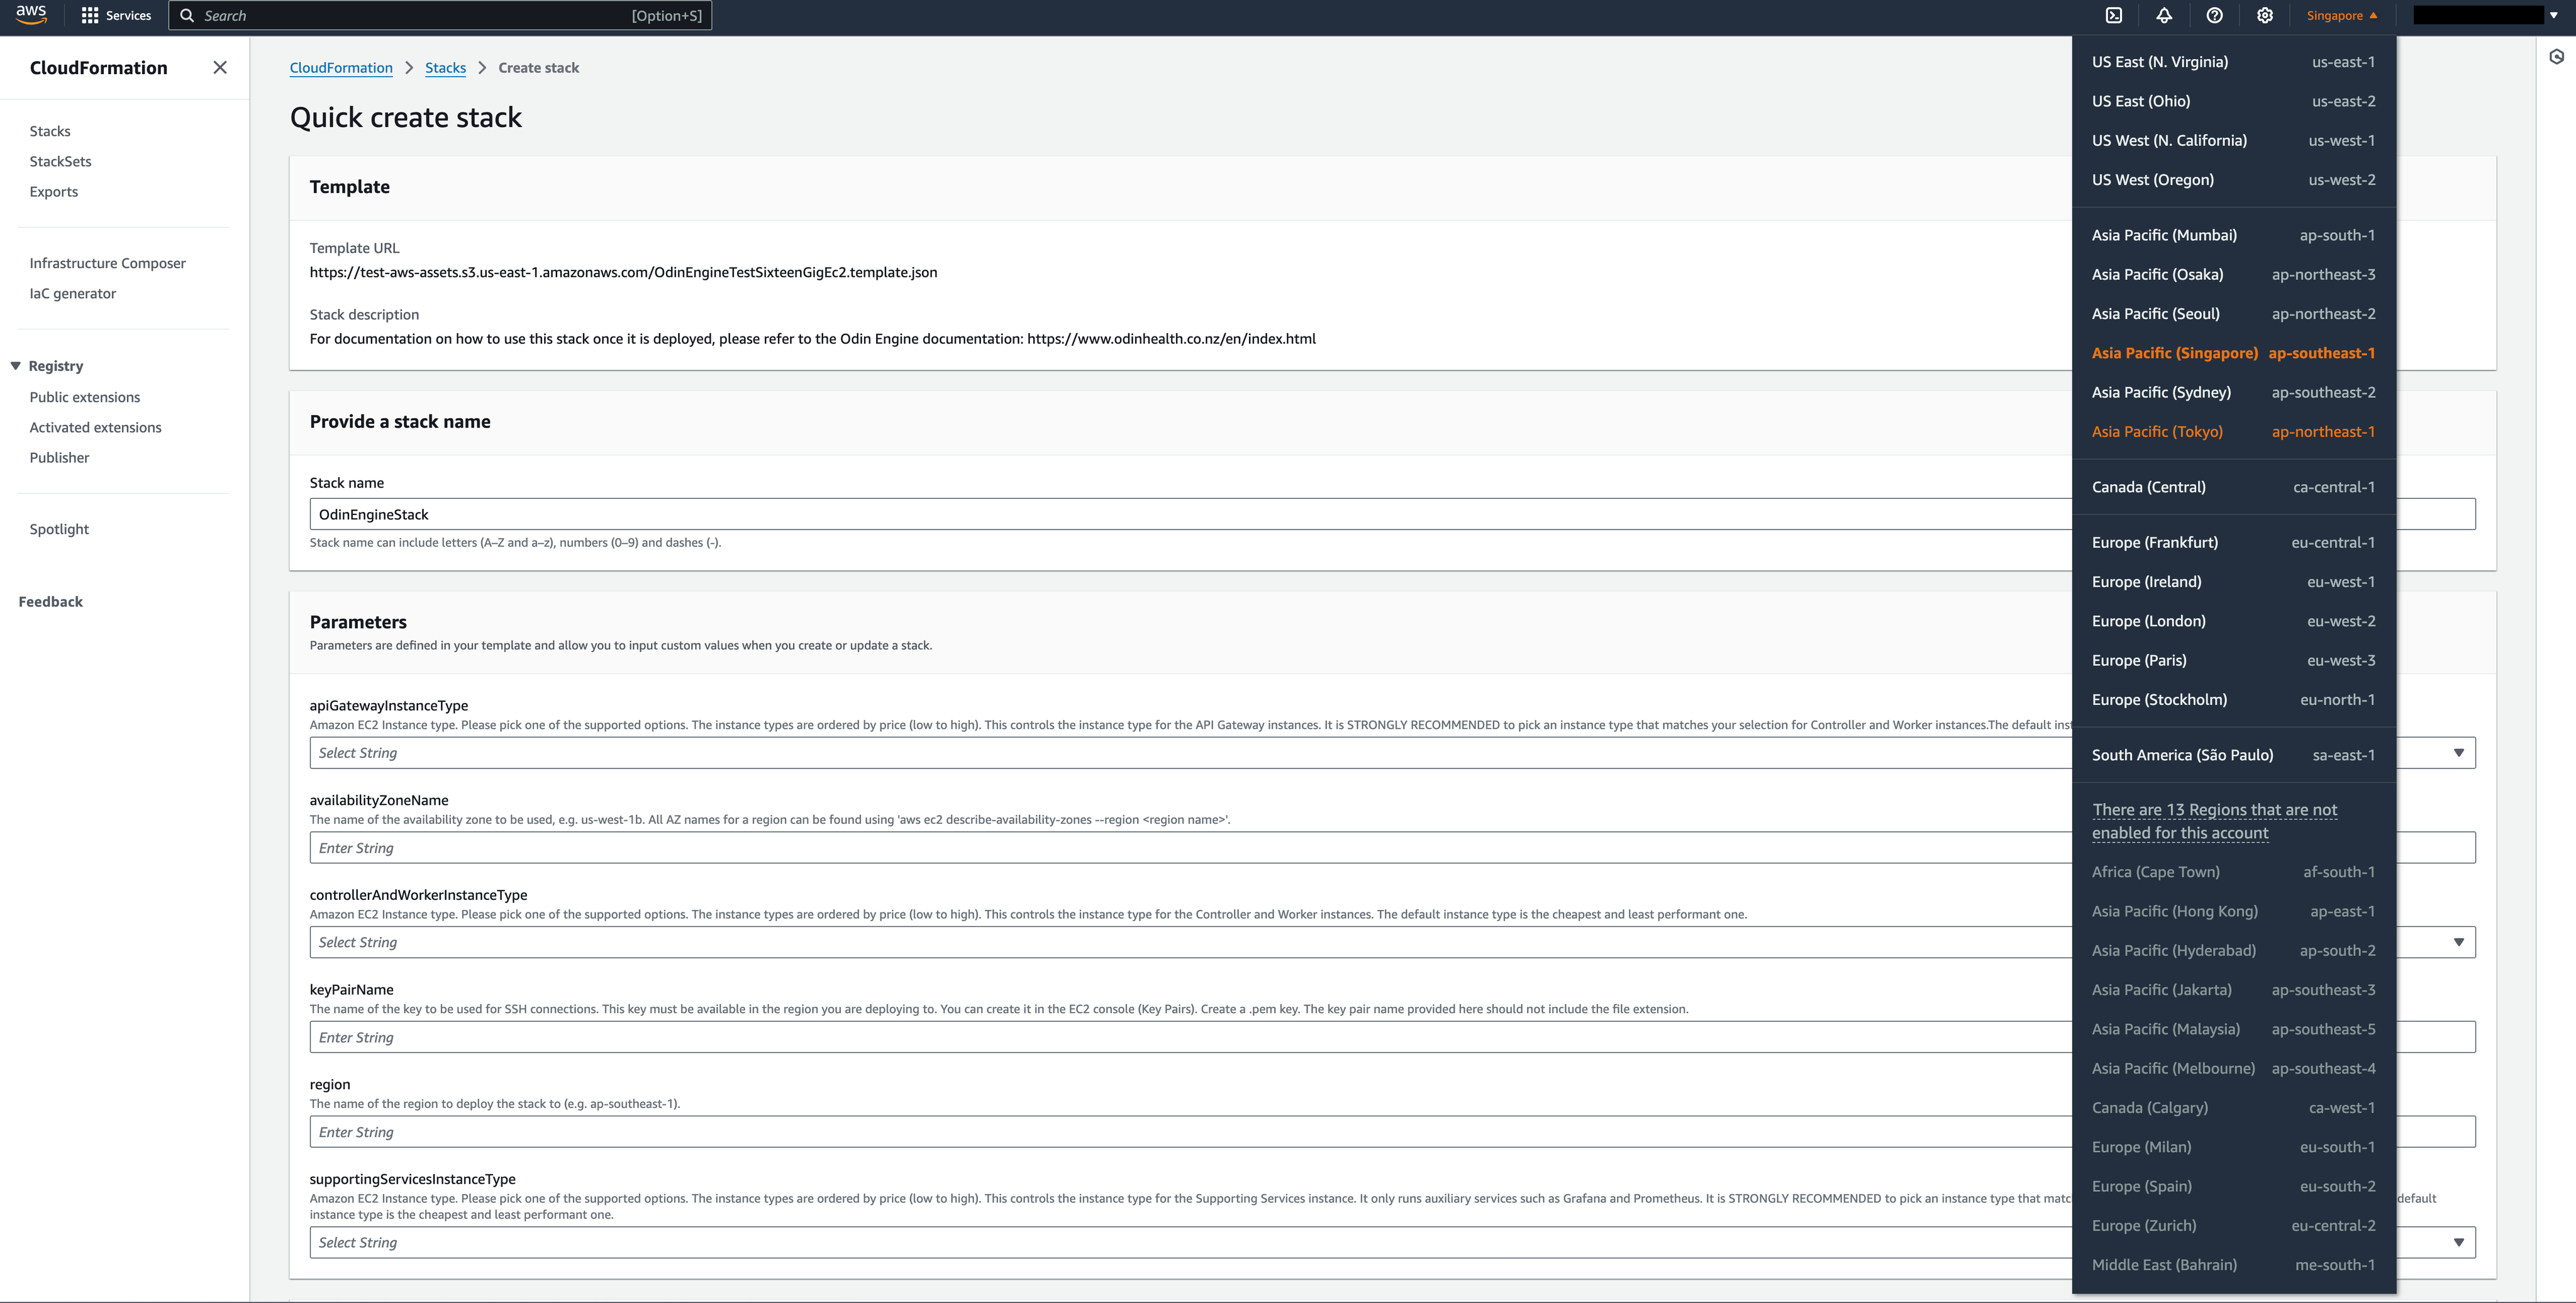
Once you’ve chosen your region, fill in the parameters on the page. A description below each parameter explains the expected values. Then, check the I acknowledge that AWS CloudFormation might create IAM resources checkbox at the bottom of the page and click Create Stack. You do not need to adjust the Permissions section for the stack deployment to work.

It usually takes around 10-15 minutes for the stack to become ready to use. You will be redirected to CloudFormation service in the AWS Management Console when you initiate stack deployment. Once the status of your stack displayed on this page becomes CREATE_COMPLETE, you can proceed to the next steps.
Access the Odin Engine Management Console#
The instances in the private subnet cannot be accessed from the outside world. While the NLBs and JumpHost are in the public subnet, they have security groups with no inbound rules defined. Therefore, before you can use Odin Engine, you will need to take a few more steps to whitelist your IPs.
Access Odin Engine Management Console#
The first step before accessing the management console is to add an inbound rule to your Development NLB’s security group. It is this NLB that acts as a proxy to the controller instance which hosts the website.
Add Inbound Rule to Development NLB’s Security Group#
Go to EC2 in AWS Management Console, and select Load Balancers. You will see the two Network Load Balancers there. To identify the Development one, you can filter them by tag:

Paste LoadBalancerType = Dev into the search box and press enter#
Next, click on the load balancer and navigate to Security tab to find its attached security group. Click on the security group and add an inbound rule to allow connections to reach Odin Engine management console. The initial listener is configured on port 8080, but can later be reconfigured. An example inbound rule to allow connecting to UI could look like this.

Select Type HTTP or HTTPS to follow the principle of least privilege#
Verify the console is available#
The URL to access the UI when the cluster is first deployed is http://[development-network-load-balancer-host]:8080. You can reconfigure the port and/or switch to using https by following instructions in NLB TLS Termination section.
For more information regarding linking external requests to projects running in Odin Engine, please signup to the portal.
(Optional) NLB TLS Termination#
Using TLS is highly recommended. It is needed to ensure that the traffic from external clients to the NLBs in the VPC is encrypted in transit. Please refer to Cluster Networking section of this guide for more on this. It is still possible to use Odin Engine without this step, but it would not be secure as that would leave data exposed during transmission. It is best to configure SSL certificates for both Development and Production NLBs.
The requests from external clients will be encrypted with TLS using your production SSL certificate once it is configured. The NLB will decrypt the requests, and transmit them on to your cluster.
Generate TLS Certificate(s)#
You will need access to DNS records for your domain name. Review the docs on registering domains with AWS’s Route 53. Other DNS providers may also be used.
Later, a subdomain (e.g., demo-service.example-hospital.com) will be created, pointing to the NLB. Access to the DNS records is required to generate SSL certificates for use by the NLBs.
You can create a public SSL certificate for the domain using AWS Certificate Manager (ACM). This is streamlined when the domain is managed by Route 53. Review the AWS Certificate Manager Docs.
The domain name on the SSL certificate must correspond to the planned domain name for Odin Engine. The domain name may be specified explicitly (e.g., demo-service.example-hospital.com), or a wildcard certificate can be used (e.g., xxx.example-hospital.com).
If the domain is registered with Route53, the TLS certificate request will automatically be approved. Otherwise, follow the instructions in ACM console to create a DNS record to validate the domain.
After validation, the certificate will be available for use in your AWS account.
Setup DNS alias for NLB#
Create a DNS record pointing from a friendly name (e.g., demo-service.example-hospital.com) to the NLB DNS name (e.g., OdinEn-Vidar-y7PfBmepSS0t-c9a6c28c1632d567.elb.ap-south-1.amazonaws.com.elb.us-east-2.amazonaws.com). You will need to do this for both NLBs.
For AWS’s Route 53, follow the instructions in AWS documentation. If you use a different DNS provider, follow their instructions for creating a CNAME record.
Configure TLS for NLB Listeners#
TLS is configured on a per-listener basis. Each listener can have its own certificate. Here’s how you do it:
- Choose a Listener
Navigate to the Listeners tab of the NLB.
Choose and modify an existing one.
- Choose the SSL/TLS Certificate
Select an ACM certificate or an IAM certificate for the listener.
Ensure the certificate matches the domain traffic routed through the NLB.
Refer to AWS documentation for more on this subject.
Verify TLS#
How you can verify TLS will depend on what listeners you have configured it for. We highly recommend configuring TLS for each listener for both load balancers.
The easiest way to verify it for Development NLB is to try to access the UI in the browser using https. You can check if your connection is successful and what certificate is used.
To verify TLS for your production NLB, you will need to call a project deployed to production in Odin Engine. How to do this is covered is covered at the end of this guide.
(Optional) Change UI Listener port to 443#
By default, you need to access the UI on port 8080. However, if TLS is configured, it is probably better to change this Development NLB Listener’s port to 443 to not have to specify the port every time in the browser. Simply navigate to Development NLB in AWS console and select the 8080 listener, then edit it to update the port.
Troubleshooting#
Deploying a stack may sometimes fail with this error:
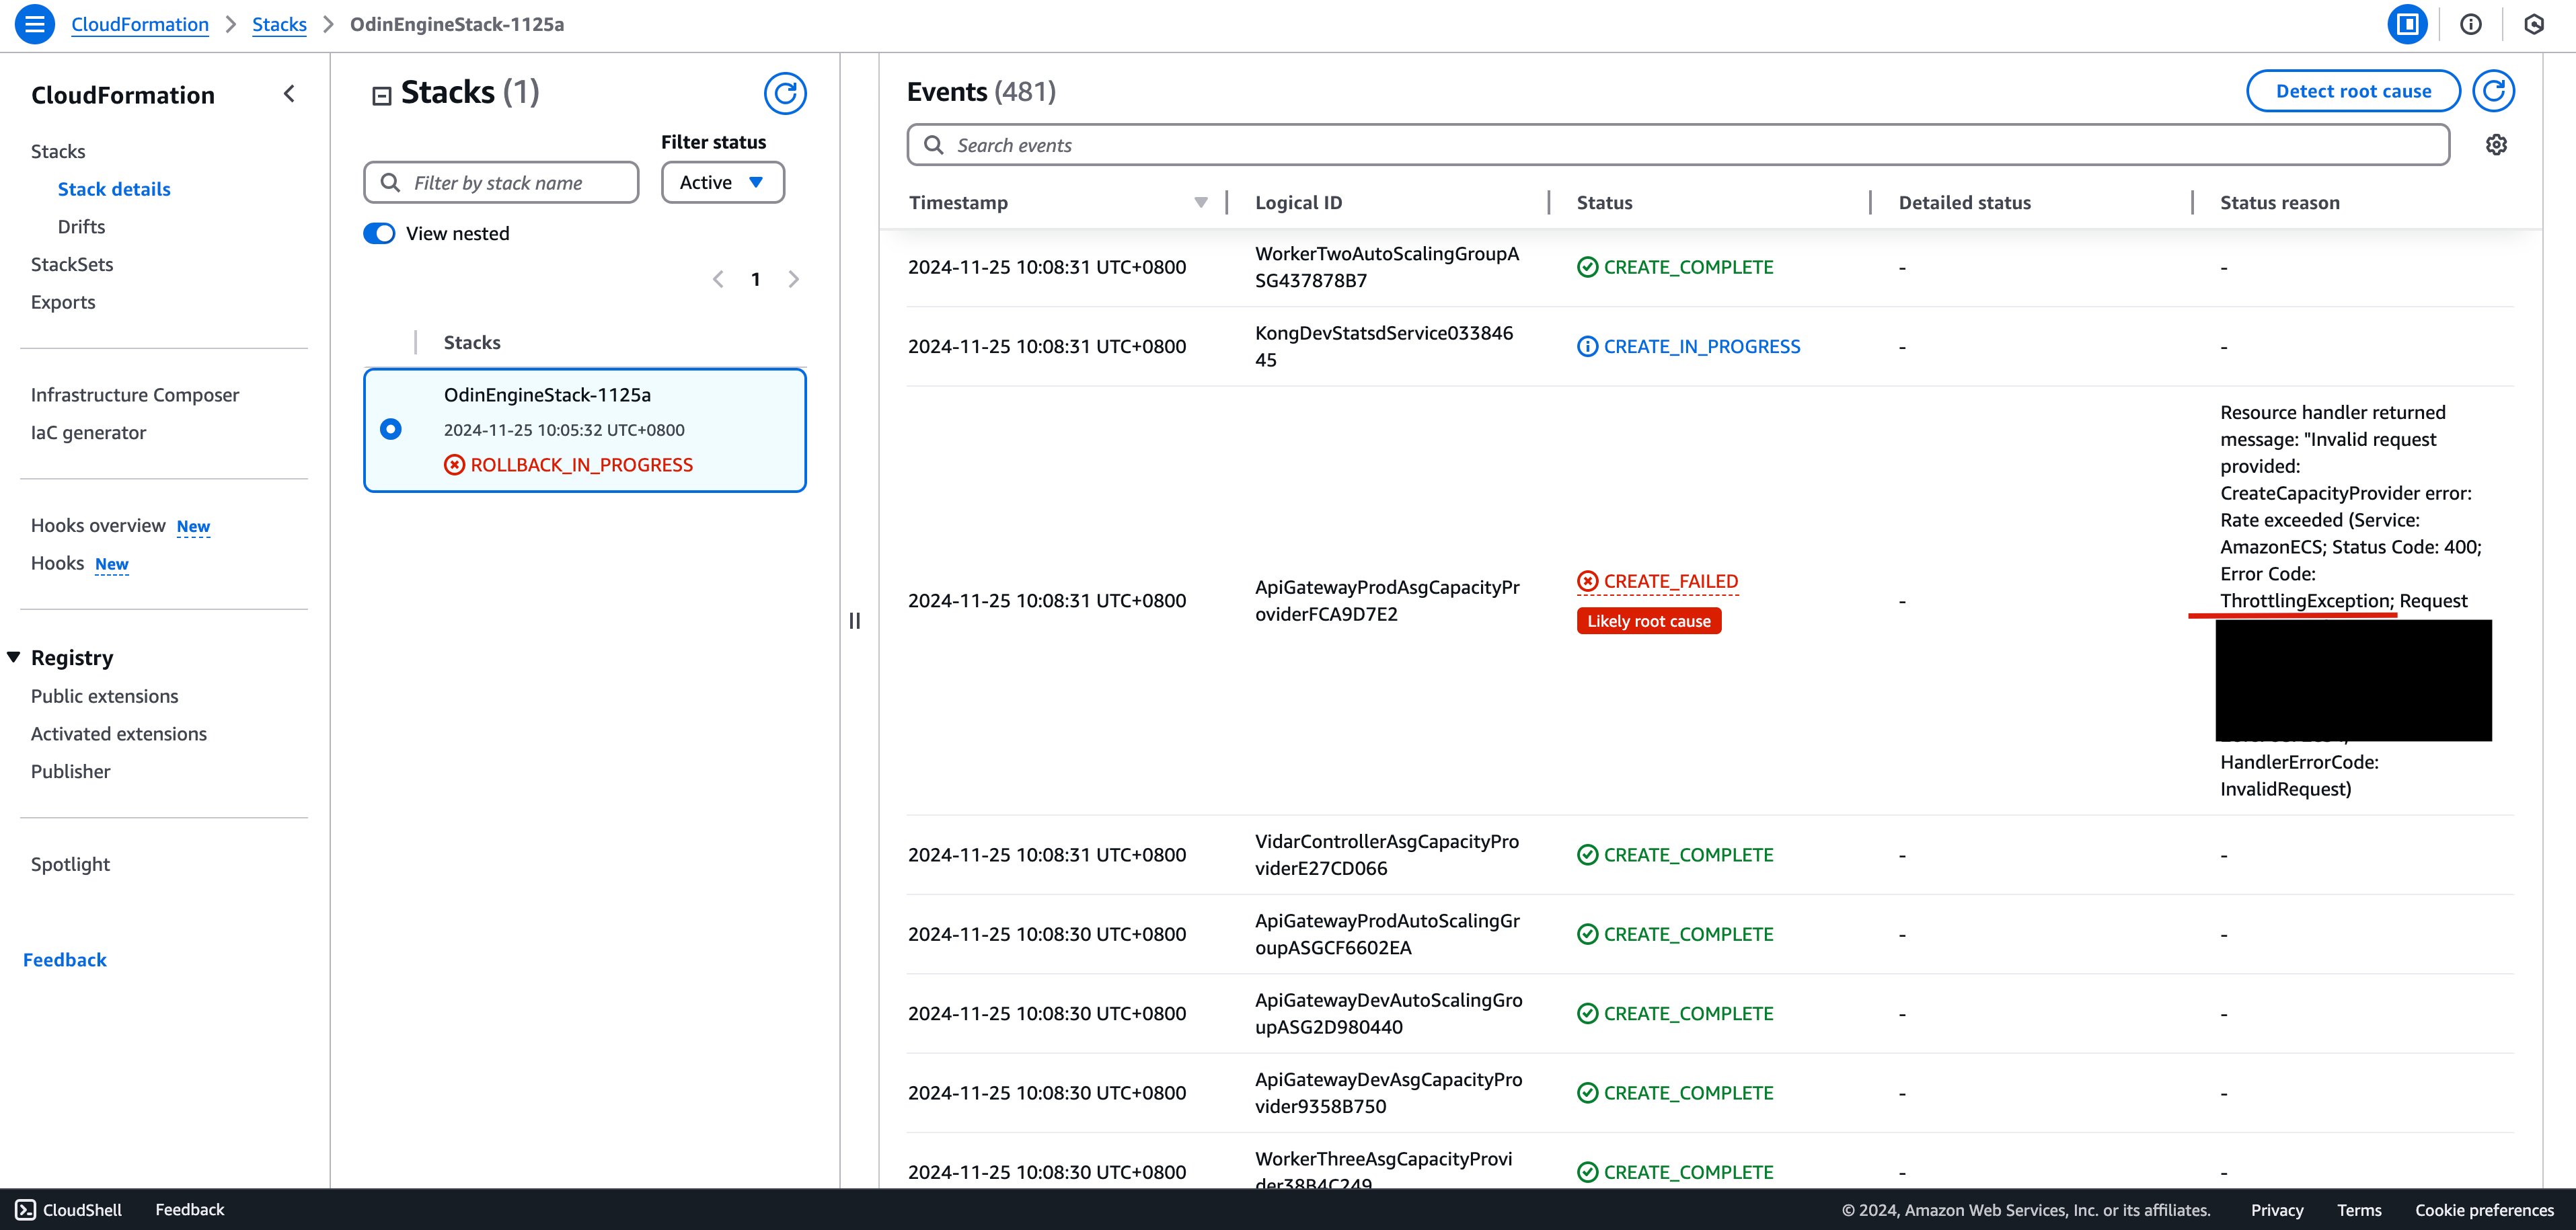
There are a few different approaches you can take in this situation, but first you will need to delete this stack and the resources that it has created. Please refer to this guide for more information on how to completely delete the stack’s resources. It is important to note that even though the cluster deployment has failed in this case, some resources still need to be cleaned up manually before it can be successfully removed.
When the stack’s status updates to DELETE_COMPLETE, there are a few options:
You can re-deploy to a different region.
If you want to attempt deploying the stack to the same region again, you will need to delete this stack and wait for about 30 minutes before attempting to deploy it again. If you attempt to re-deploy to the same region again, it’s very likely that the same error will come up.
You can contact AWS support to enquire about this issue and possibly request them to adjust your API throttling quota for CreateCapacityProvider API call for your account. Refer to this page for more information. This will usually not be needed, as this issue is rare and simply redeploying the stack will usually be enough to resolve it.
